Cast Iron Skillet Pizza
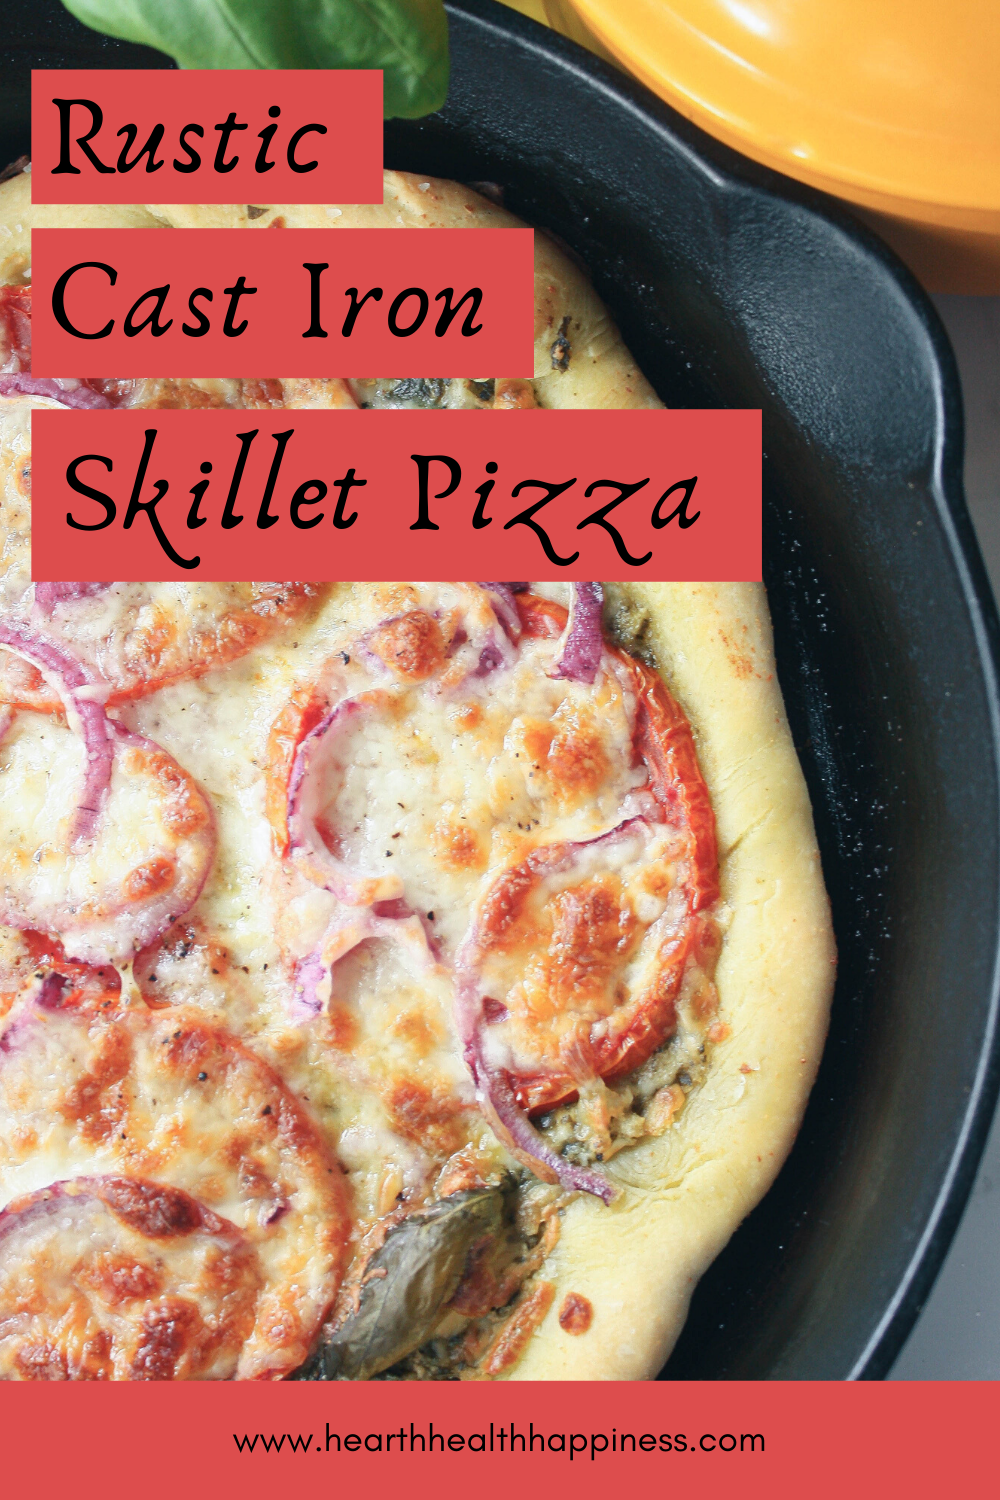
Rustic Cast Iron Skillet Pizza
The glories of the cast iron skillet never cease to amaze me. Seriously, what can it not do? I love everything about it; the versatility, the aesthetic, the fact that it adds notes of flavor to dishes...and so much more. If you're reading this, chances are you are already well-versed in the intricacies of the cast iron skillet. But, have you ever made a personal-size (ish) cast iron skillet pizza? If you already have a baking sheet or pizza stone, there is not *necessarily* any particular reason to bake it in the cast iron pan. What inspired me to create this dish, though, is the rustic look - if you have a certain tablescape motif to design - and the fact that you can add another dish to the cast iron skillet baking family. For those of us in smaller spaces right now, using one dish for different purposes is a huge win.
What you'll love about this cast iron pizza
Cast iron pizza hits all the right rustic tones without needing to pull out a special pizza stone, or implement any special equipment (though, pizza stones are great, too!). That's part of what is fantastic about kitchen tools that can carry many duties; you can save space without sacrificing quality. The cast iron skillet can "take the heat" when baking at higher temperatures, so is an ideal option with the 475ºF oven required for this particular cast iron pizza.
Sometimes, personal size is just better. This pizza's serving size is technically two servings. Divide the servings however you choose, or make a few pizzas back-to-back (or in 2 cast iron skillets) if you have a few more mouths to feed. Simply double the topping ingredients, since the pizza dough is large enough for two pizzas, or another use (like mini cinnamon rolls!).
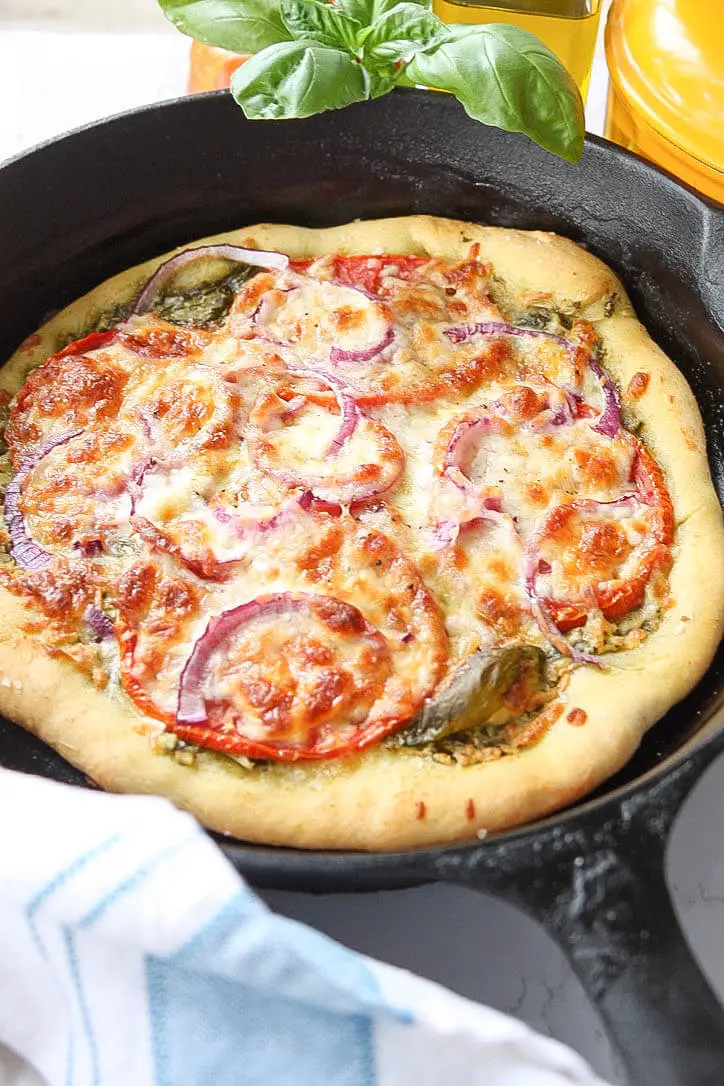
The crust in a cast iron pizza is simply perfection. The bottom of the crust is flavorful, but sturdy and offers an ideal amount of puffy crust around the edges. You can even allow the cast iron skillet to preheat in the oven, so the pizza dough will start to cook immediately. If you do choose to let it preheat, be careful when adding the ingredients to the skillet, or build the pizza outside the skillet and slide it in before baking.
Pesto replaces traditional pizza sauce in this recipe, creating a flavorful twist on a classic pizza. However, the large tomato slices still give this an (optional) tomato flavor that is just delicious.
The dough only needs to rise for a few hours. Usually, the rule of thumb for dough rise time is overnight (and that can create an even more flavorful crust), but this works great with only a few hours on your hands.
Would you like to save this?
Ingredients and Acceptable Substitutions
Homemade Skillet Pizza Dough
All-purpose flour: You will add the leavening to this manually, so stick with all-purpose flour in this recipe. I keep unbleached flour on hand for use in most baked goods, but you are welcome to use bleached flour if that is all you have.
Packet of active dry yeast: Dry yeast has a coating that requires soaking in water before adding it to the dough. Follow the instructions on the packet, but note that colder water is usually just as acceptable as the temperature on the label. If using instant yeast, you can skip the step of rehydrating.
Water: Needed to rehydrate the yeast and add moisture. Lukewarm is fine, and there is no need to measure an exact temperature.
Kosher salt: This is the best salt option for even distribution.
Granulated sugar: Don't worry, you won't need much sugar! The sugar enhances the dough flavor and provides the yeast with some food to make it more robust. Yum.

Skillet Pizza Toppings
Extra virgin olive oil: Add to the skillet before baking the pizza. This helps prevent stickiness and gives the bottom crust a little extra flavor. You can substitute with avocado oil, if desired. Note that avocado oil has a higher smoke point. Choose an oil whose smoke point can handle the high oven temperatures.
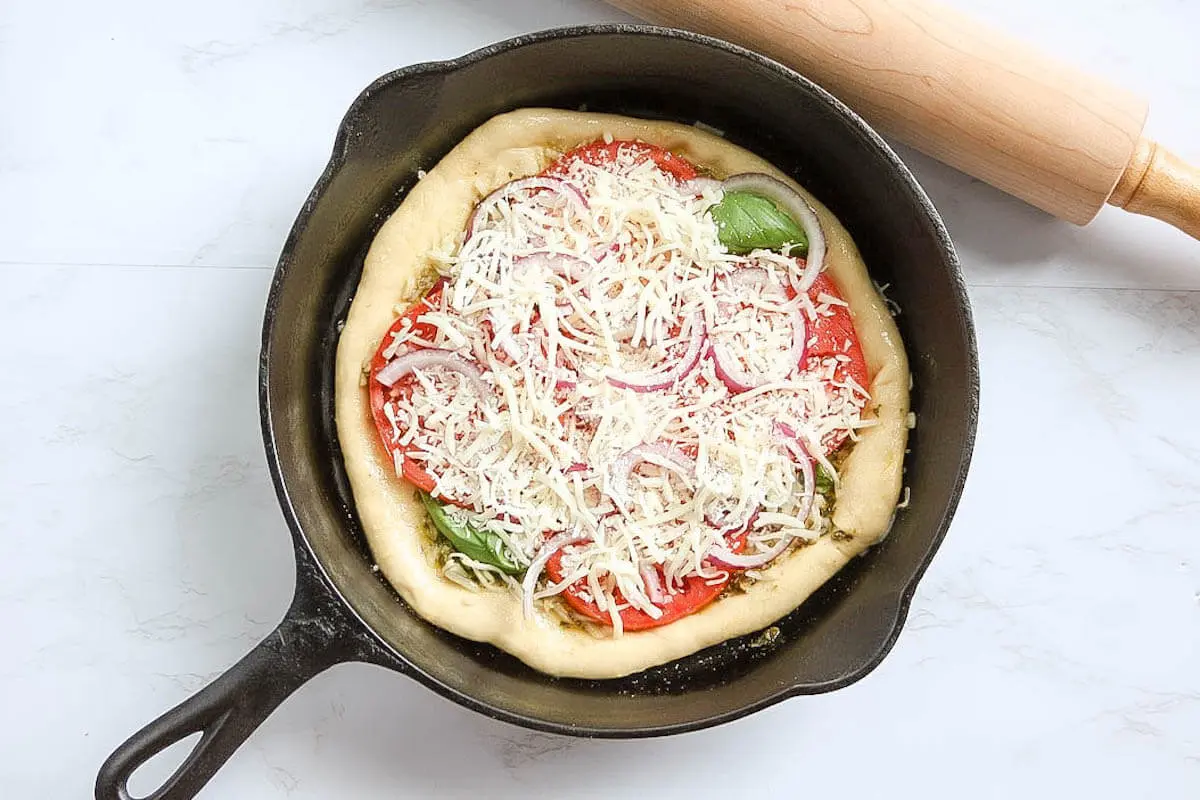
Pesto: Fresh pesto is always wonderful, but a store-bought option is perfectly fine. Pesto serves as the pizza sauce.
Shredded Mozarella cheese: Use the cheese of your choice, but mozarella is a popular choice, especially with pesto and tomato flavors.
Large tomato slices: Since this is the only source of tomato flavor, you can control how much or little you use. Customize this with smaller cherry tomatoes or make this dish extra rustic with quality heirloom tomatoes.
Fresh basil leaves: This is optional, but offers a delicate, herb flavor that compliments the pesto.
Garlic: For flavor, of course. The fresh garlic works well with the bold topping flavors.
Red onion slices: Red onion cuts the sweetness of the pesto, tomato, and basil leaves. A little hint of sharp flavor provides great contrast! Omit, or use the onion of your choice. Shallots can provide a more mild alternative if you aren't interested in traditional onion.
Freshly-ground black pepper: Pre-ground pepper is fine, but freshly-ground offers a more potent spice.
Crust Flavor
Melted butter: For richness, but you can use olive oil if avoiding animal products.
Garlic powder: Mix this in with the melted butter or olive oil. The powder provides more thorough coverage over the entire crust.
Coarse sea salt: Instead of the kosher salt used earlier, adding a little extra salt to the top of the crust means you can use a more coarse grain. I like the look of the flecks of salt on the crust, so it also adds to the rustic look.
Prep the dough and pick your toppings
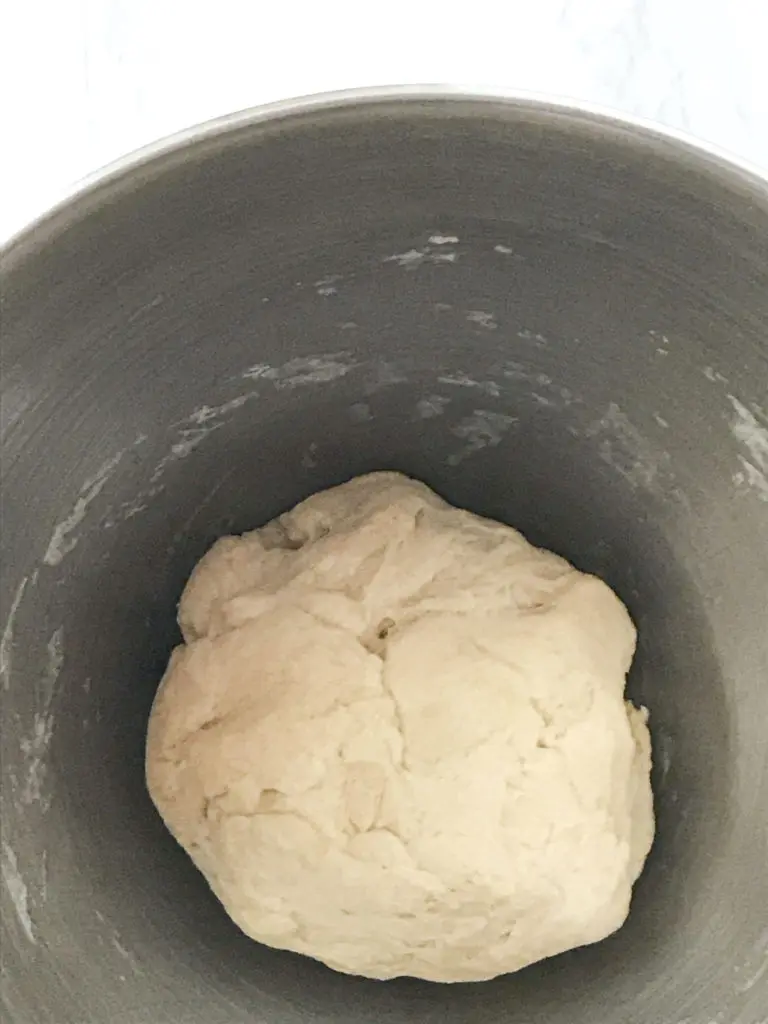
Before you allow the dough to rise, make sure the consistency is not to "tacky." If it sticks to your fingers like chewed gum would (gross, I know), then you need to add a little more flour. The dough should push back against you, without grasping your finger like a newborn baby. Cute, right? 😉
Want to make your own dough? Check out this handy pizza dough calculator!
Pro Tip:
Use a pastry brush to apply an egg wash, melted butter, or EVOO to the crust of the pizza before baking. Sprinkle in a little garlic powder to make the crust taste extra yummy.
A Few Added Tips...
- The pizza dough is just thick enough to be tender, but sturdy enough to remove the pizza from the skillet without the risk of breaking. Transfer the baked, cast iron skillet pizza to a board and slice.
- Return the slices to the skillet and serve, if you are building a mixed-texture motif on your table.
- Add whatever toppings you prefer; for example, this was a pesto-based pizza because of the large tomato slices, but you could easily use a tomato-based sauce and build a completely different pizza with other ingredients. If you do use different toppings that include vegetables, take inventory of those veggies. If they are particularly hardy, consider pre-cooking them before adding to the pizza dough and avoid excess moisture by giving them a good squeeze. Be sure not to overload the pizza with toppings (hard to do, I know!)...nobody wants a soggy pizza. At least, nobody I know.
- If you have time to let the dough rise overnight, that is best. But, you can choose to use the dough immediately after kneading (for a very thin crust), allow to sit for a few hours covered with a towel, or allow to sit overnight (also covered with a towel).
Recipe

Cast Iron Skillet Pizza
Ingredients
Method
- In a stand mixer, combine water, dry yeast packet, and sugar in a mixing bowl. Let stand for 5 minutes.
- Add flour and salt, gently stirring to combine. Using a dough hook attachment, knead the dough on low speed (about 3 minutes) until the dough clings to the hook and is slightly rubbery to the touch. If it sticks to your fingers, add flour one tablespoon at a time until it becomes less tacky.
- Let rise for 1 ½ to 2 hours. Cut in half at the end of that time and reserve the other half for later use.
- Roll the dough out into the shape of your skillet, leaving the edges slightly thicker. If your skillet hasn't been seasoned since your last cleaning, add a drop of avocado or olive oil.
- Preheat oven to 475ºF.
- Spread pesto evenly on the dough. Sprinkle minced garlic around the center. Add kosher salt and half the cheese. Create a tomato and basil layer, red onion, and pepper. Finish with remaining cheese and and sea salt.
- Add garlic powder to melted butter and use pastry brush to brush on the edges of the pizza. Sprinkle with a little extra sea salt.
- Bake for 20 - 25 minutes, or until crust turns a slight golden brown and the cheese bubbles with bits of crispy brown on top.
- Allow to cool before removing from skillet and cutting. Return sliced pieces to skillet for serving, if desired.
Tried this recipe?
Let us know how it was!Frequently Asked Questions
Is cast iron good for pizza?
Absolutely! First, selecting kitchen tools, like a cast iron skillet or pan, is great for multiple uses. Not to mention, the fact it can last longer than a (human) lifetime means it deserves extra applause. We should strive to decrease our reliance on single-use objects, regardless of kitchen size. The versatility of the cast iron skillet is difficult to beat. Since cast iron skillets are heavier than traditional skillets as well as poor conductors of heat, they actually maintain their temperature better than other materials, once heated.
Pizzas bake better in high heat, so the composition of cast iron pans make them an ideal baking companion. The crust of the pizza serves as the buffer in a traditional cast iron skillet, which helps prevent food from developing off-flavors. Keep in mind that off-flavors tend to develop with acidic foods like tomatoes. So, don't make a tomato sauce in a cast iron skillet, unless the item is an enameled cast iron.
Pizza crusts are also more flavorful and crisp when they come into contact with a pre-heated surface before baking. The heavier cast iron skillet that maintains its temperature is great. Be careful placing the pizza in any preheated pan or skillet in order to protect your fingers.
Does pizza stick to cast iron?
Avoid the dreaded post-baking pizza stick by using a seasoned cast iron pan that has also been preheated and coated with a little olive oil. Once the dough comes into contact with the preheated skillet (remember, the cast iron maintains its heat very well), it will start to crisp along the bottom and make it easier to remove when you are done. If you are working with a particularly sticky dough - or just want some extra insurance - you can sprinkle a little wheat bran, flour, or cornmeal into the bottom of the skillet before adding the dough for a little more protection.
Should I preheat cast iron for pizza?
Yes, I recommend preheating the cast iron skillet in the oven prior to baking. The skillet can sit in the oven while it preheats to 475ºF. Be sure to use caution when removing it from the oven (use a hotpad) and don't forget it in the oven if your pizza prep is interrupted.
But, is a pizza stone better than cast iron?
Where pizza stones differ from cast iron materials is in the (1) durability, (2) ease of use, and (3) availability. Pizza stones can crack or break, making them a little less durable than a trusty cast iron. In terms of "ease of use," pizza stones are a little harder to clean. Though cast irons need to be cleaned with care as well, they are technically more straightforward. Plus, you can use the cast iron for a multitude of kitchen tasks, making this a win in our book. Pizza stones are great, but we are always grateful for items that pull double, triple, and quadruple duty.
Add this to your list of comfort foods and let your cast iron skillet continue serving as the wonderful workhorse it is. Let me know what you enjoy most about your cast iron and until next time, cheers to your #hearthhealthhappiness!
Favorite Skillet Recipes
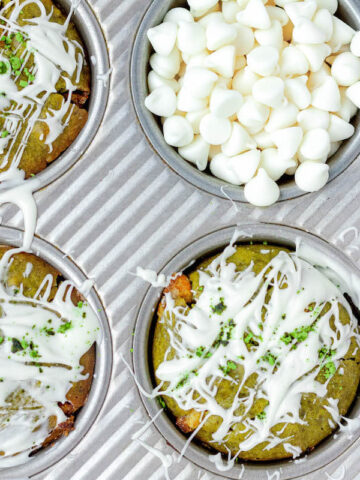
Mini Cinnamon Rolls
Adorable and sweetened to perfection, use the remaining skillet pizza dough to make a batch of bite-sized cinnamon rolls perfect for breakfast, dessert, or a snack!
Cast Iron Skillet Cookie
A giant cookie that is also a little healthier than its cousin? Yes, please! Make this vegan-friendly in a snap and enjoy a delicious dessert straight from your trusty cast iron.
Apple Cinnamon Skillet Cake
Nostalgic flavors come together to form a dessert that is ideal for fall, but delicious during any season. Apple flavors are front and center with bits of apple and hints of applesauce. Cinnamon, pecans, and vanilla extract perfect this ultimate cast iron comfort food.

2 Comments